fishing for words

(and tossing out random thoughts)


6 Comments

Mother Nature wins, but it’s okay (and accumulatingmy 15 minutes of fame, a few seconds at a time)

The thought last weekend was to get away for a rare five-day retreat, spending some time at the family cabin, entertaining ourselves with visits to wineries in nearby Murphys, squeezing in a bit of fly fishing on one of the few open rivers in the Sierra foothills and generally stepping away — far away — from the everyday.

We had enjoyed three weeks of spring-like weather prior to our departure, but the moment we publicly announced our plans, Mother Nature decided she knew better.

[singlepic id=1076 w=300 h=199 float=center]

A better use of snow.

The drive that got us up to Hwy 108 was easy enough, with stops along the way for lunch and gwaking at Bass Pro. It was after the last stop at Covers Apple Ranch that Mrs. Nature gave us fair warning with steady snowfall as we wound the seven miles to the eastern (and higher) edge of Twain Harte. By the time we reached town, the inches of snow that frosted the familiar with a fresh coat of newness also dictated extreme caution.

While I don’t mind clearing the white stuff to pull into the driveway or the nearly two feet of snow that that muffled and covered the world outside the next morning; I didn’t like the resulting power outage, the excavation of that 60-foot driveway a second and third time, and the increased release of water in the only nearby and fishable tailwater. Though we were thankful for the propane-fired heater, stove and water heater, the lack of power for 48-plus hours wasn’t fun. It was dark by 6:00 p.m. and it’s difficult to read, much less tie flies, by candlelight. Fishing was out of the question the next day as flows on the Stanislaus rose in 40 hours from less than 250 cfs to nearly 1,100 cfs.

We surrendered about 42 hours after our arrival. In that time I learned the value of a snow blower after shoveling the driveway three times, clearing an estimated accumulation of four feet of snow. (My arms agreed with rusty mathematics that suggested I moved over 1,900 cubic feet of the stuff.) Proving that Mother Nature maintains a healthy sense of irony, we were greeted by blue skies just as that last of the gear was packed into the car.

[singlepic id=1082 w=600 h=399 float=center]

Mother Nature, The Joker. The skies cleared after nearly four feet of snow snuffed out
the power and we went about departure preparations. (More photos below.)

However, we both enjoyed being in a winter wonderland for a while, spending one afternoon tucked into The Rock resaurant with a good draught of Smithwicks ale, a few appetizers and a cozy view of dime-sized flakes floating to earth. I personally enjoyed introducing The Wife, for the first time in her life, to real, heavy snowfall. We also learned that the Prius can do well enough in the snow.

I don’t begrudge Mother Nature for cutting our trip short with piles of snow; it’s the resulting runoff that’ll keep the trout happy and make for excellent Sierra fishing in the late summer and fall.

A Few More Seconds of Fame

It’s nice to know that Orvis Fly Fishing Guide Podcast host Tom Rosenbauer thought enough of my comment on Facebook to mention it in his latest podcast. If you’d care to listen, you only have to wait until about 1:30 into the podcast.
[audio:http://media.libsyn.com/media/orvisffguide/15_tips_on_Sight_fishing_for_Stripers.mp3|titles=Orvis Podcast-2/22/2011]

I responded to Mr. Rosenbauer’s podcast of a week ago, “Gear Maintenance in the Off-Season and Ten Tips for the Aging Angler,” with a personal anecdote that there are indeed exercises that could help the aging angler. Though I have yet to be officially recognized for my longevity, a gym membership put to good use during the last year or so seems to have improved my balance during wading, something I attribute to core exercises, namely crunches, bridge, planks and rotational movements.

Admittedly, as a generally lazy meditative lot, exercise may be foreign to most fly fishermen, and the most widely practiced workout is casting, which coincidently builds up muscles used to also hoist a beer or scotch.


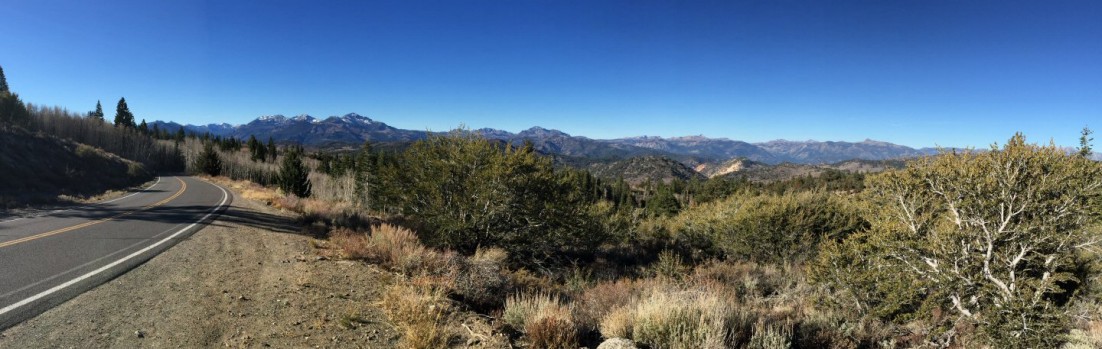
More of what we saw during our shortened stay at The Cabin last weekend:
[nggallery id=77]


1 Comment

what we see… (02/23/2011)

  • Something for the fly fisherman who drifts nymphs (and who naturally tends to be a more imaginative fellow): http://bit.ly/idvg6v
  • Local story of those who have transcended the desire to hook fish: http://bit.ly/gw1x13
  • Despite my unaccomplished casting, I’ll be helping out this weekend (or used as an example of how not to cast): http://bit.ly/cxSHt9
  • What we saw during an aborted attempt at a long weekend away: 


1 Comment

dropping the blogging ball

To the chagrin of some folks I’m not retiring like other bloggers we know, but I am “dropping the ball” this week to spend a little time in the Sierra foothills. It comes down to simple logistics. The family cabin is truly that; a few rooms insulated only by a couple of inches of siding, a simple affair with no connection to the Internet.

That’s not to say it’ll be time away from the everyday without sacrifice. There is a plan afoot to fit in some fly fishing — regardless of weather forecasts that include snow at elevations not too far from where we’ll be chasing wild trout.

I won’t jinx this unusual winter trip with any details, except to say that even The Wife has taken notice of my itch to fish and freely volunteered that I might visit one of the few open western Sierra foothill rivers. Maybe the feverish tying of flies and a continuous parade of fly fishing television shows gave me away.

It’s been more than a year since I’ve tested this tailwater. For the most part, I’ll be going subsurface, mainly through riffles and tailouts. Though this time of year it’s the more imaginative fly fishing technique nymphing that’s more effective bringing up the fish, with some luck late afternoon might include a decent blue-winged olive mayfly hatch.

To anticipate one question; no, I won’t be taking the new rod. Even it were fished, there be steelhead in this river and the one fish that broke me off in 2009 suggests that it’s better to carry a rod with a little more backbone.

Hopefully, I’ll be back with more than a tale of a riverside hike.


1 Comment

part five of building a rod: glossing over things

I’m a bit betwixt and between things until next Thursday, and because the forecast shows raining beginning that day, there’s an outside chance there’ll be some fishing. That’ll be then.

For now, this morning, I’ll be consulting with the club’s guru of rod construction on a one of two finishing touches for the 4 wt that’s sitting pretty on the dining room table.

[singlepic id=1070 w=275 h=183 float=center]

Epoxy covering the tip top wrap.

My goal last week was to lay down epoxy on the guide feet and butt wrap, and did so with modest success. Unfortunately, it wasn’t as warm as it should have been for this first pass at epoxying. Though opinions vary, I’m convinced that a temperature of 70°F or better is necessary for the best results. That day it was about 68°F.

Then there’s the need for speed. I was a bit too careful, apparently, beginning to coat the tip top guide wrap and working down the rod. My thought was to start with the smaller guides and quickly work toward the stripping guide before the pool of epoxy became unworkable. The epoxy was still workable when I reached the stripping guide but a new batch was required before coating the thread wraps above the grip. Then it was a matter of rotating the rod pieces to allow the epoxy to flow, hopefully creating an even coating 360 degrees around the wraps. A couple of hours later, it looked pretty good.

However, after a few days of drying the gloss of the hardened epoxy revealed flaws inflicted by my inexperience a temperature that was a bit too low. It was time for 600-grit sandpaper.

Like it often is with fly fishing, taking the time to step back, look things over and make adjustments can pay off; and so it is with rod building. I sanded portions of the epoxy on five guides and spend time smoothing out the epoxy covering the long wrap above the grip. Later, the temperature climbed above seventy. Epoxy was mixed and cooperated, flowing readily with only a few bubbles, which were easily dispatched by blowing on them through a straw. The sections were again regularly rotated until the epoxy set. The results were well worth it.

After this morning, the butt section should be ready for a last coat of epoxy, and then it’s be off to a club member for a custom inscription that will, without reservation, tell those who look close enough that it’s the result of my work.

[singlepic id=1071 w=600 h=399 float=center]

Epoxy covering the tip top wrap. Look closely and you'll see the bubbles that have since been sanded out.


2 Comments

what we see… (02/09/2011)

  • The Unaccomplished Angler and Trout Underground step up when John Walsh doesn’t: http://bit.ly/hztyUN, http://bit.ly/hA4G4K
  • Going on my “I Want that Job” list, because of the trout; nothing to do with co-host Hilary Hutcheson. (Look out Rich Birdsell.): http://bit.ly/gpDlMf
  • What trout will you chase? And what’s this “Other Trout” some folks will be waving sticks at: http://bit.ly/hGIAyd
  • Below, a day at the Oakland Zoo (The Wife declared this date “Spontaneous Saturday.” We ended up at the Oakland Zoo and enjoyed dinner with the San Mateo nephews and their parents.):

[nggallery id=76]


4 Comments

new fishing license; origami encouraged

California 2011 Fishing License of 22.25 Inches

At 22¼'' it’d be a very nice trout.

One of the more common discussions these days among Golden State fly fishermen these days, besides whether a bead head nymph can be called a fly, is the new fishing licenses. For those who don’t know, it’s likely that California’s fishing and hunting licensing system finally matches something your state was using 10 or more years ago.

My permanent annual license was kicked out by the Automated License Data System and it arrived the other day (a temporary was printed from the computer). Attached to the dollar-bill-sized basic sport fishing license is a required report card for the steelhead I’ll never hook.

I measured it. It’s sad when the license is longer than most of the trout that end up in my net. …Sad that the license is so long; I’m perfectly happy with smaller wild fish. Folks who add sturgeon report cards, hunting licenses or are lucky enough to have a lifetime licenses have reported lengths of 10 feet or more.

(I’d be remiss if I didn’t mention that the license I purchased in Washington state last year and recently returned with fat zeros on the catch record card measured just about as long as my new California license.)

There’s an upside. It’s no longer a requirement to visibly display your license. I thought about putting mine in my wallet, giving it a girth not seen in many years.

That, on the other hand, may not be a great idea.

These licenses are printed on waterproof thermal paper. Waterproof good; thermal paper bad. Leave it exposed to heat source and you’ll be making a trip to get a new one.

However, a swipe of your driver’s license your local vendor can retrieve your current license data, and for a small fee, print a duplicate. Applying circular reasoning, maybe the boys in Sacramento, short on revenue, did know what they were doing all along…

P.S. Sometime after this post goes up I should be applying epoxy to a certain 4 wt fly rod.


4 Comments

…they’re the people that you read each day*

This post brought to you by the writing prompt “Which Outdoor Bloggers
would you like to Meet?
” from the Outdoor Blogger Network (OBN),
though not all of the bloggers mentioned here are OBN members…


Contemplating this question I realized how lucky I was to meet Kirk from The Unaccomplished Angler in person before his recent retreat from fame. It certainly brings your inflated online impression of someone who’s written a few books and maintains a consistently enjoyable blog down to earth when you sneak up on him while he’s doing yard work. Though I’ve already met him, I’d still like to someday take up Kirk on his offer to spend some time on “The Forks.”

I started my blog before the term existed. I started in 1997 with a simple website that was cumbersome to update, and because it was hand-coded HTML, new content (e.g. “posts”) appeared periodically. (Those of you who recently stepped into blogging don’t know how easy y’all have it with CMS and blog publishing applications.)

Then one day I came across something quite wonderful back in aught-six of the third millennium. One of the first blogs that actually looked pretty nice. Tom Chandler had pieced together a good-looking layout for The Trout Underground. My more modest talent has allowed me to make some money in the field of writing, and Tom’s prose gave me the inspiration to reach outside my training as a journalist for the creative side of writing. Just as much as I enjoy Tom as a writer (regardless of whether his Fly Fishing Underground Writer’s Network is competition for OBN), there’s also the lure of joining him on some of his home waters, which are open during the winter, when I’m often jonesing for a fly fishing fix.

Linking from The Trout Underground, before I knew it would be against better judgment, I ended up on Singlebarbed, where Keith Barton‘s skewed outlook near the shores of the Lil Stinkin’ can alternately leave you laughing, crying or shaking your head. His take on fly tying is what I like best…there’s no recipe that doesn’t deserve to be messed with, whether that means cheap different materials, methods or colors. Keith fishes some less-than-pristine waters near me, but meeting and fishing with him might require a 55-gallon drum of body sanitizer and a hazmat suit.

I’ve found that recovery from a visit to Singlebarbed can be aided by a visit to David Knapp’s The Trout Zone. David’s got a keen eye for photography and a “quiet” writing style. David fishes some prime trout waters in Tennessee, particularly the type of small streams I enjoy; all the more reason to want to meet him for some photo pointers and fishing.

It’s possible I could go on writing for pages and pages screens and screens about various bloggers that I’d enjoy meeting and likely fish with, but to finish up I’d have to include Chris Hunt over at Eat More Brook Trout. How can one not love his blog’s irreverent name? Personally, his story is one that I could make my own — a journalist who retires to work for Trout Unlimited, write essays about fly fishing and spend his free time fly fishing in a pretty awesome place. Even if only for a few days, Chris would be another guy with whom I could spend some time.

In closing, I’d certainly have to add Rebecca Garlock (The Outdooress) and Joe Wolf (Flowing Waters) to my list. Not necessarily because I’ve enjoyed reading their blogs (I have), but to possibly get a glimmer of a hint into their plan for OBN’s worldwide fly fishing blog domination.


*”Oh, who are the people in your neighborhood blog network?
In your neighborhood blog network?
Say, who are the people in your neighborhood blog network?
The people that you meet read each day”


5 Comments

is toasted missing blogger toast?

A main virtue of blogging is that there’s no demand it be taken seriously. Unlike news reporting, there’s no accountability. Unlike writing a novel, paperback or children’s book, one doesn’t have to worry about sales. That’s not to say it can’t or won’t be taken seriously. Like everything else on the Internet, blogs can contain gems of knowledge, humor or insight.

The only pressure behind a blog is that applied by the writer him/herself. Often this self-applied pressure gets to be too much, and a blog is formally retired or slowly slides into oblivion.

One blogger I’ve come to know fell off the radar so fast that the good folks at Outdoor Blogger Network are a bit elated worried and would still like to know where he might be. There’s speculation that he’s retired. I only know that wherever Mr. Unaccomplished Angler, aka Kirk Werner, might be, he’d better not be fishing.

As one who’s also spent a career throwing together words that might mean something to someone, admittedly not as creatively as Kirk’s series of Olive, The Little Wooly Bugger books or his blog, writing means you’ll never be able to afford retirement. So I disagree slightly with Jay over at The Naturalist’s Angle blog. (And I’ll admit to intially wondering if Jay was writing about fly fishing au naturel.)

Recent rumors regarding Kirk swirl like a back eddy around design work for a suspiciously unnamed client and a fourth Olive book. There are other, unsubstantiated reports of both Mr. & Mrs. UA involved in an outdoor activity that smacks of a New Year resolution and taking in a movie. I’d suggest that Kirk has set aside the trappings of fly fishing and has “retired” to his home office to focus on bring home the bacon.

So I think the folks at OBN can rest easy; there’s no need to call on the services of local NBC King 5 reporter “Danger” Jim Forman.

Some say he's a fly fishing machine, others call him Unaccomplished.

From where I sit, based on the sparse evidence so far collected, Kirk is paying the price, as most of us working stiffs do, for spending a wee bit too much time fly fishing. (If there can be such a thing.) Yes, bills need to be paid, and just as important, the family and wife deserve a share of his time.

Once his dog Eddie begins to recognize him again without the aid of four or five Milk-Bones, I’ve no doubt that Kirk, ratty River Guide hat on his head, will leave for his next misadventure.

With more blog fodder, he’ll be back.


3 Comments

part four of building a rod: wrapping up a few things

Last week I mentioned patience as one virtue required of rod building. This week patience has been required in spades.

Wrapping fly rod guides reminds me of trying to thread a size 22 fly with 8x tippet. You hope to be lucky and get it right the first time. In my limited experience, when it comes to wrapping guides, hope and luck aren’t enough. Preparation and practice pay dividends; and I got most of my practice in with one guide that required wrapping, unwrapping and rewrapping at least six times.

The goal is to wrap thread up against itself, then up onto the foot of a guide until the guide is sufficiently held in place. Securing the guide in place requires aligning each wrap of the thread, sometimes burnishing it into place with a toothpick, skewer or other often improvised tool.

[singlepic id=1034 w=600 h=399 float=center]

Beginning the wrapping process with the thread locked in place.

Starting the wrap is one of the few times that being all thumbs can be of benefit. The idea is to lay down a wrap and while holding the thread in place with a thumb, bring the tag end to the inside of the wrap and, continuing to hold the thread in place with that thumb, use that thumb to gently roll the rod blank so that subsequent wraps lock the tag end in place. Three or four wraps later the tag end can be cut and the wrapping begins in earnest.

Until one gets to the foot of the guide.

Wrapping up the guide foot is easily understood. As threads wrap against each other, they should begin to climb the foot of the guide. Execution is another thing all together. The thread didn’t always act as expected, and too often the first wrap popped off the guide foot with a telltale ping. Thus, I grew proficient at reversing the wrapping process with a few reverse turns of the thread spool.

[singlepic id=1035 w=600 h=399 float=center]

Starting to wrap up the guide foot; easier said than done consistently.

Locking the thread into place was another challenge in trusting in my proficiency and the behavior of my materials…a bit like tying flies. I was instructed to secure a loop of thread, preferably a different color, underneath the wrapping thread.

Once the wrapping thread reaches its endpoint — where the guide angled away from the rod blank — it would be cut (again using a thumb to hold the wrapped thread in place) and the tag end inserted in the loop. Pulling the loop would bring the tag end under the wrapping thread to secure it.

[singlepic id=1036 w=600 h=399 float=center]

The loop of thread that will pull the tag end through secured with a wrap. Time to trust in the force...

Then, cutting the tag end cut short enough would ensure that it wouldn’t be pulled out from under the wraps. This is also the point at which practice makes perfect. Pulling the looped thread too slowly would allow the tag end to slip next to the guide foot, where a gap between the thread and the rod blank would prevent the tag end from locking into place. I did that a few times before realizing that cutting the tag end as short as possible and throwing caution to the wind and a quick yank would lock the thread into place.

With a bit of luck I’ll finish up wrapping the rod tonight. I finished all but one of the guides last night, and tonight will be devoted to that last guide and wraps on the butt section. I’ll also have to decide whether to throw on a few decorative wraps of metallic thread, but I don’t think the fish will notice one way or the other.

[singlepic id=1040 w=600 h=399 float=center]

A finished guide. Pretty nice. (The color of the thread will become darker after epoxy is applied.)


Leave a comment

part three of building a rod: getting our butts in place

I just gently set down the butt end of my new rod, with grip and reel seat in place, for the umpteenth time this week, and I still haven’t grasped the notion that some day I’ll use it to land on trout on some unknown river or stream.

I’ll chalk it up to never having built a rod before (though I do tie some of my own flies), and the fact that the upper sections of the rod blank are still a bit naked.

Construction is a bigger part of fly fishing than most people realize. Building rods and tying flies are the most cost-effective approaches, if your calculations include materials, tools and your time, but I don’t know too fly fishermen who are great mathematicians. Most of them, however, would say that given the choice, they’d rather catch a small wild trout on a fly and rod put together with their own two hands.

[singlepic id=1032 w=300 h=452 float=center]

Getting ahead of ourselves.

That’s what had me, on a foggy morning last week, arrive early at a workshop just across the Carquinez Strait for free doughnuts, to kill a bit of time and, somewhere along the line, install the grip and reel seat on the butt section of what would become my latest fly rod. It was cold day; the air was still, the fog heavy, dense and unmoving — a day when it makes sense to build something for the days ahead.

Slider, who owns the workshop, opened the door and Phil, enlisted to assist the students, pulled a rod case and other paraphernalia from the back of his truck and joined me in the still chilly shop. Soon coffee was brewing and small doughnuts were consumed, one after another. We talked about new grip designs, rod blanks and the fog before other students and mentors crowded into the shop. (It’s hard to believe by the number of students that the sport needs a celebrity cheerleader.)

It wasn’t long before tables were covered with the bits and pieces required to build a fly rod. Like men tend to do, I caught myself comparing my grip with those of others; some of more intricate designs, others made wood or composites. It’s true that there’s a certain level of art ascribed to fly rods, so while my grip might not have a spit-shine gloss or woven pattern, it’s my first; made by me with a bit of assistance.

Reel seats and inserts were as varied as the students, with hardware colors varying from nickel and titanium to blued nickel and black aluminum. It was the same with the guides and winding checks.

Being a somewhat self-centered crowd, it was a sight to see a room full of fly fishermen stop talking about their latest escapade to devote attention to the class leader and club master rod builder, Wayne. Quiet but intense might describe Wayne’s approach to instruction, as he walked us through — with the necessary visual aids — dry assembly of the grip and reel seat, reaming the grip, again testing everything with a dry fitting, adjusting the diameter of the blank with tape to properly fit the reel seat, application of epoxy and the final assembly.

Then we were set free but not left entirely to our own, with a 2-to-1 ratio of students to mentors.

The process isn’t one of great difficulty. The biggest requirements are patience and thought. Pictures best tell the story.

[singlepic id=1026 w=615 h=408 float=center]

The surprising small amount of hardware that would be used on our fly rods.

All considered, a fly rod requires very little hardware. It’s the work building the blank, grip and reel seat that require time. Once we confirmed all the parts were delivered as promised, the next hour or so was devoted to dry fitting, taping the butt section to create a suitable diameter where the reel seat would go into place, and reaming the center of the grip.

[singlepic id=1027 w=615 h=408 float=center]

Master rod builder Wayne demonstrating how to measure and mark of the butt section that will be covered in epoxy before installation of the reel seat and grip.

Much like carpentry, the key was to measure twice and cut (or ream, tape and apply epoxy) once. One important aspect of this measurement is to determine how far up the rod butt one will slather epoxy, since, because of the taper, the grip will be pushed down towards the bottom of the blank – passing the upper section where epoxy would make for a pretty ugly rod – before reaching the proper position.

[singlepic id=1028 w=615 h=408 float=center]

Taping the grip to protect it from epoxy – which will get on your hands – and the butt section to build up a proper diameter for the reel seat and insert.

It’s amazing, but if you were to disassemble a well-known brand of fly rod, you’d find a similar method and material used to properly seat the reel seat. What’s not pictured here is the copious amount of epoxy pushed into the gaps between the tape and directly securing the reel seat to the rod blank.

[singlepic id=1029 w=615 h=408 float=center]

Reaming the inner diameter of grips to properly fit the rod.

With the variety of sizes in rod blanks, there’s no way to ensure a perfect fit between everything, requiring a bit of work and continuous testing of the fit. The hole drilled out in the cork grip, or rings in my case, is often about .25”, but since the rod blank is tapered, the best fit requires tapering his hole. Cork is easily reamed, but the dozen times I stopped to check the fit mandated slow and methodical work.

With the grip, reel seat and the reel seat cap in place, a little pressure brings it all together while the 10-minute epoxy dries.

[singlepic id=1031 w=615 h=408 float=center]

The completed butt assembly of what will become a 7’6” 4-piece 4 wt. fly rod built by my hands.

With time to spare, we stuffed glue into the tip top guide and seated it on the top section. Some builders use a heat-sensitive glue, but Wayne’s done just as well with five-minute epoxy. There was more epoxy stuffed into those little tip top guides than I thought possible, before we slid it on the top of the rod blank. (I should note that during this process a good supply of solvent was used to ensure that epoxy didn’t end up where it wasn’t wanted.)

With our butts in place, we will move on to wrapping guides this week.

Though not fishing, this is one winter that I’ll have my hands a fly rod nearly every week. Stay tuned, more to come.

[nggallery id=74]